Goals
The data collected during the flight of our balloon must be storied on a memory device on-board. This is because we will not be able to communicate with our payload while it is in flight. So to get the data, we must retrieve the balloon and memory device. We chose to log all of our data to a SD card. A SD card was chosen because they are cheap, fast to write to, and Arduino includes libraries with functions for writing to them. Data should be able to write to the SD card at a rate of 10 times per second.
Connections
We need to connect the SD card to our Arduino so we can write data to it. Below is a picture of the breakout board chosen to accomplish this task. The board is from sparkfun.com.
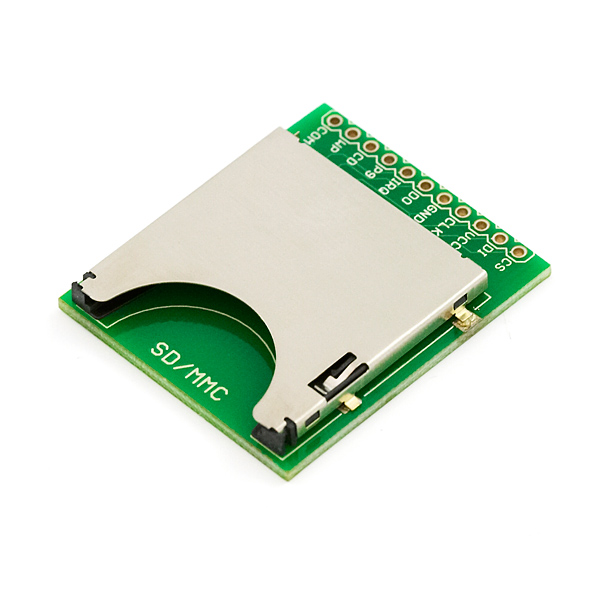
This board has a push-push socket for the SD card and 11 pin connections. The only pins we need to use are data in, data out, serial clock, chip select, input voltage, and ground. We supply it with 3.3 volts directly from the Arduino. The following connections are made to the digital pins of the Arduino: CS to pin 10, DI to pin 11, DO to pin 12, and CLK to pin 13.
A standard SD card is used. We used an 8 gb SDHC card formatted FAT32.
Code
The code used to communicate with the SD card is straight forward using Arduino. Arduino includes libraries with functions to communicate with SD cards. As with all code, we have checks along the way to ensure data is being record. We begin by checking that the SD card can be accessed by the Arduino. If it cannot be accessed, the program ends and an error message is output to the serial monitor. If it can be accessed, a CSV file is created if one does not exist on the card or, if one does exists, a blank line is created below the most recent data. We then add labels to the file so we know what column of data goes with each sensor. An example of this section of code is shown below.

The next section of code reads all of the data from the sensors and then writes them on a new line of the CSV file on the SD card. The method used to do this is longer than we would have liked to use because the sprintf function in Arduino does not work properly according to several online sources. This would have allowed us to create a single string of the values and write it to the SD card. However, the method we used works just as well, just with a few extra lines of code. The code that logs the data is shown below.

We should note that the final line shown was change from dataLog.flush(); the flush command only allowed 8 lines of data to log. After changing to the close function, there were no problems. The close function also calls the flush function so the same method is still used.
Testing and Results
To test this, we ran the code overnight connected to a computer. Data was logged at a rate of 10 times per second. After 8 hours, all of the data had logged making a CSV fiile just under 14 mb in size.
The next test was done after soldering the sensors and Arduino to a single perf board. The circuit was put into a cooler of dry ice to simulate the low temperatures experienced during the flight. The Arduino was powered by two AA battery packs wired in series to give 12 volts to the Arduino. Data was logged for a total of 24 hours for this test making a file around 40 mb in size. 12 hours total were spent inside the cooler and 12 hours outside of it. The Arduino was able to provide fairly consistent voltage to all of the sensors for the duration of the test. The biggest problem we had was the data write speed decreasing over time. Data is set to be written ever 100 milliseconds. By the end, the maximum time between writes was 135 milliseconds. However, the time does not increase much until after 4 hours. Since our balloon flight will be between 2 and 3 hours, this should not be a problem.
A section of sample data is shown below to get the idea of what the file will look like when opened.

The acceleration sensor is the most sensitive to changes in input voltage. As shown here, it needs to be calibrated because it was sitting still during the test and it was the first test using the battery packs. The acceleration readings remained consistent after 24 hours so after the offset is implemented in the code, the readings will be accurate.
Recommendations
The final step will be to mount this board inside the payload and put insulation around it. Once mounted, it will not move at all inside the payload, so we do not need to worry about connections being broken. We will also use fresh, new batteries for the flight.
No comments:
Post a Comment